Rabu, 14 Desember 2011

Cara Merubah Foto Berwarna Menjadi Sketsa Pensil di Photoshop CS5

“Bagaimana cara merubah foto berwarna menjadi sketsa warna pensil?

Berikut Caranya :

1. Buka photoshopnya. Setelah itu carilah gambar yang akan dijadikan sketsa pensil. Namun kali ini, saya akan menampilkan gambar motor ducatinya vr46, Lihat gambar pertama di bawah ini:
2. Setelah gambar pertama tertampilkan, langkah selanjutnya yaitu : Arahkan Mouse anda pada "motor ducatinya vr46, " dalam hal ini Background


kemudian klik kanan dan pilih "Duplicated Layer".
3. Setelah anda membuat duplicated gambar, Klik “Ctrl + Shift + U” maka Gambar akan berubah menjadi Hitam putih”.
Lihat Gambar Kedua ( 2 ) di bawah ini :


4. Setelah gambar berubah menjadi hitam putih, langkah selanjutnya yaitu :
Buatlah duplicated lagi, seperti cara diatas, kemudian klik “Ctrl + i” maka gambar akan berubah menjadi gambar film,
lihat Gambar Ketiga ( 3 ) di bawah ini :

5. Setelah Gambar Ketiga ( 3 ) tertampilan. Untuk selanjutnya yaitu :
Arahkan mouse Pada “Filter > Blur > Gaussian Blur” maka akan keluar jendela pop_up Gaussian blurnya,
setelah itu pada “Radius Pixel” berilah nilai sebesar “3,3” kemudian Klik Ok.
Dan lihatlah hasil gambar keempat ( 4 ) di bawah ini :


6. Pada gambar keempat ( 4) jika diperhatikan, gambar tersebut tampak Tidak jelas atau juga memudar.
Namun dari gambar tersebutlah yang Menjadikan gambar lebih jelas setelah terjadinya perpindahan warna.
Oleh sebab itu, untuk langkah terakhirnya yaitu : Pada gambar keempat ( 4 ) tertampilkan, Arahkan mouse pada “Set The Blending Mode For The Layer”, lihat gambar di bawah ini :

Keterangan
Pada gambar disamping ini, ubahlah nama “Normal” menjadi “Color Dodge”
Setelah anda mengubah Mode “Normal” menjadi “Color Dodge” maka, gambar secara langsung akan berubah menjadi sketsa warna pensil, lihat hasil gambar penyelesaiannya di bawah ini :


Kita akan ubah gambar yang diatas menjadi draw effect
Jadi, sebelumnya silahken save gambar tersebut

Berikut langkah singkatnya
Buka gambar yang telah di save tadi.
Tools yang akan kita gunakan adalah eraser tool (kiri) tapi juga bisa menggunakan brush tool (kanan). Tools dapat dipilih sesuai kebutuhkan kita.
sebelumnya ctrl+d dulu gambar menjadi 3 setelah itu ctlr+e supaya efek pensil menjadi tebal


kita akan mulai. Duplikat layer asli (Background) dengan menekan CTRL + J lalu select Layer 1. Pastikan Layer 1 telah ter-select, jangan sampai Background! Hapus sedikit bagian gambar yang di layer 1 (yang dillingkari).


Berikutnya duplikat kembali Layer 1 hingga akan muncul Layer 1 copy, lalu select layer 1 copy kemudian hapus kembali beberapa bagian.
Duplikat kembali layer 1 copy hingga akan muncul layer 1 copy 2, lalu lanjutkan menghapus beberapa bagian kembali.
Lakukan ulang langkah yang ada di spoiler nomer 4, 5, dan 6 berulang kali sampai garis yang ada habis.Jika gambar pesawat tersebut sudah habis terhapus, kurang lebih akan seperti ini tampilannya.
Dengan tumpukan layer 1 copy ... yang banyak sekali.
Banyak sedikitnya layer dipengaruhi ketika kalian menghapus perbagiannya, jadi bisa lebih banyak dari yang ada di contoh atau bisa juga lebih sedikit dari yang ada di contoh.

Kita mulai ke bagian per-animasiannya Disinilah letak kemenarikan efek ini
kita mulai dari paling atas untik bagian pertama animasi,, sampai seterusnya


Source : http://yasiranak252.blogspot.com/2011/03/merubah-foto-berwarna-menjadi-sketsa.html

Rabu, 30 November 2011

Membiasakan Diri Menjadi Leader atas Manajemen Waktu yang Efektif

whjobs.info

Kadang dalam keseharian kita saat bekerja, kita menjumpai atau bahkan kita mengalami sendiri kondisi yang sibuk atau bahkan sangat sibuk, dan sayangnya kondisi sangat sibuk tersebut berulang terus setiao hari dan setiap waktu. Sehingga seolah-olah kita sudah tidak sempat lagi rehat sejenak, bahkan makanpun juga gak sempat. Bahkan kalo ditanyapun, lebih penting makan atau menyelesaikan pekerjaan, kita selalu menjawab sama-sama pentingnya, nah saat dilanjut pertanyaannya lebih mendesak (urgent) mana, makan atau menyelesaikan pekerjaan, juga dijawab: sebenarnya sama-sama urgentnya.
Dalam matrik manajemen waktu, kita kelompokkan status aktifitas yang anda lakukan menjadi 2 hal mendasar yaitu:
  • Penting: Hal-hal yang mendukung Misi/Visi kita
  • Genting: (tampaknya) memerlukan Tindakan Segera
Coba Anda tulis aktifitas anda sehari-hari dalam rentang satu bulan, dan mari kita cek apakah anda sudah menjadi leader dalam pemanfaatan waktu secara efektif ataukah belum. Dinatara katifitas anda mungkin beberapa diantaranya sbb:
  • Telepon
  • Membuat laporan – laporan yang menyita waktu
  • Rapat – rapat persiapan deadline
  • Menjawab e-mail yang tidak penting
  • Membangun hubungan dengan orang lain
  • Berbicara berlebihan dengan rekan kerja
  • Terlibat dalam masalah-masalah orang lain
  • Membuat perencanaan
  • Mengahadapi problem yang menekan Anda
  • Relaksasi yang diperlukan
  • Olah raga
  • Mengejar deadline yang tertunda
  • Melakukan tindakan pencegahan
  • Melakukan pelatihan kepada rekan kerja
Diantara aktifitas diatas, coba anda kelompokkan kedalam 2 kategori diatas dan kombinasinya, sehingga didapatkan kelompok matriks menejemen waktu menjadi 4 bagian sebagai berikut:
  • Kuadran I : PENTING, GENTING
  • Kuadran II: PENTING, TAK GENTING
  • Kuadran III: TAK PENTING, GENTING
  • Kuadran IV: TAK PENTING, TAK GENTING
Secara umum bagaimana orang kebanyakan memanfaatkan waktunya?
  • Kuadran I : PENTING, GENTING== > (20-30 %)
  • Kuadran II: PENTING, TAK GENTING== > (15-20 %)
  • Kuadran III: TAK PENTING, GENTING== >  (50-60 %)
  • Kuadran IV: TAK PENTING, TAK GENTING== > (2-3 % )
Dari hasil kuadran diatas, bisa kita lihat sebagian besar, orang menjalankan aktifitas yang tidak penting, namun dalam kondisi yang mendesak (harus segera dijalankan, jika tidak berpengaruh terhadap hal lain/darurat). Kondisi ini tidak efektif mengingat, untuk aktifitas yang tidak penting seharusnya sdh bisa di jadwalkan dengan baik sehingga tidak mendesak untuk dijalankan.Orang-orang dikuadran III inilh yang mungkin sering kita lihat selalu sibuk sampe makan siangpun serasa nggak sempat.
Nah sekarang bagaimana World Class Company (Leader yg efektif) memanfaatkan waktunya?
  • Kuadran I : PENTING, GENTING== > (10-15 %)
  • Kuadran II: PENTING, TAK GENTING== > (70-80 %)
  • Kuadran III: TAK PENTING, GENTING== >  (10-15 %)
  • Kuadran IV: TAK PENTING, TAK GENTING== > (<1 % )
Jika kita lihat, dalam manajemen waktu yang efektif, sebagian besar kita harus berada di kudran II, karena sebagai leader, tentunya yang kita kerjakan banyak hal yang penting, dan dari semua yang peting tersebut bisa kita atur jadwalnya sehingga berada pada kondisi normal atau tidak genting/tidak mendesak untuk dijalankan.
Bagaimana dengan manejemen waktu Anda?
Salam Hangat,
Sukses di Tangan Anda


Selasa, 20 September 2011

Yang enak koq kurang promosi : Kopi Flores

Yang enak koq kurang promosi : Kopi Flores

By ton6312 toaja
Saya belum pernah menyaksikan iklan di media tentang kopi Flores di atas, padahal kopi ini punya cita rasa “nendang” dan layak untuk diketahui publik penggemar kopi. Kebetulan pas jalan2 ke Giant supermarket, kopi ini terselip dan menarik perhatian saya karena warna kemasannya yang cukup mencolok. Beli sebungkus kecil seharga 5000 perak dan langsung diseduh, hhmmmm perfecto. Menurut saya sih, jauh lebih baik dengan kopi yang beredar (sudah tahu kan merek2nya).
Diproduksi oleh Nutraco Group yang mengeluarkan banyak jenis kopi dan bisa dilihat di websitenya di sini. Semua kopi diproduksi secara organik, artinya haram menggunakan berbagai pestisida atau pupuk kimia untuk tetap menjaga kesuburan lahan. Kalau mau test, coba yang berasa hazelnut, suatu kombinasi yang pas tanpa mengurangi tendangan kopi ini. Kalau sudah coba, bagi pengalamannya di sini ya.

cikopi.com

Anda tipe penikmat kopi mana ?

tradisional
Banyak cara menikmati secangkir kopi, yang praktis dengan metode seduh hingga yang rumit seperti membuat espresso. Sebagai penikmati kopi, tipe mana yang menjadi favorit ?
(Dulu pernah di posting, tapi supaya lebih nge-jreng saya tampilkan dengan foto2nya sekalian :) )

sachet
french1
cm7
bialetti
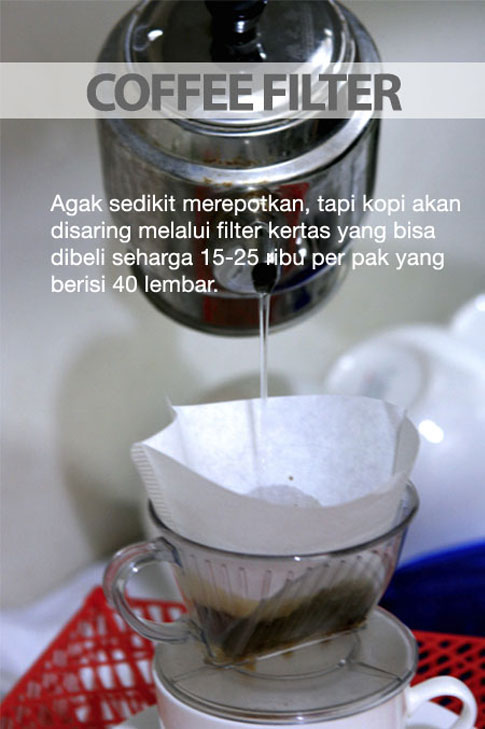
filter3
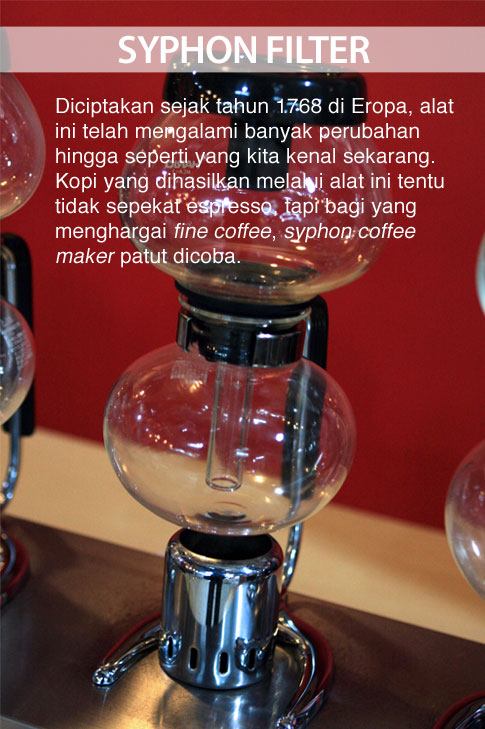
syphon
espresso1


method

 http://www.cikopi.com

Senin, 25 Juli 2011

When too much detail on a WBS becomes a To-Do List

In all my years of doing project management I have noticed that the WBS keeps getting bigger with ever increasing detail. I have observed that the PM on these projects who are maintaining these WBS documents is quite proud of the detail and their ability to manage this detail. In reality they are micro managing their projects, which are many cases is not what the PM really believes they are doing. All this detail has changed the WBS into a “To Do” list. This not what the WBS was intended to do.
Micro-management is appropriate when you have slackers working for you. This style tends to encourage dependency on the project manager rather than on the team members who should be held responsible for their results.
PMs are consistently more effective when they hold team members accountable for reaching measured achievements rather than just completing a “to do” list.
“To Do” lists are very hard to maintain and consumes PM time in clerical functions rather than managing the project. Members have to report on detail tasks which decrease the odds of receiving accurate and timely status reports. Also who is looking at the detail? Most of the reporting on a project is done at the summary level or on the critical path. Leave the detail to the task leaders they will break down what needs to be done and report back up to the summary status.
So how long should a task be on a WBS? I have found that the durations be between 1 week and 8 weeks long. Status reporting at a minimum should be weekly on the activities in the WBS. There can be no compromise on weekly reporting. With high level tasks the entry of status should take no more than 15-30 minutes per week of a member’s time to report, even considering multiple projects.

http://projectsolversblog.com/2011/07/05/when-too-much-detail-on-a-wbs-becomes-a-to-do-list/

Rabu, 06 Juli 2011

How to become certified by ASME (Status: Januar 2010)

1.
The "Applicant" (Manufacturer) sends a telefax/letter to the ASME Accreditation Department / National Board (NB) to request original "Application Forms"
(ASME Fax No: 001 212 591 8599 / NB: 001 614 847 1828) or download it from:


2.
Signing of an inspection Service Agreement between the AIA (OneBeacon America Insurance Company / ONE/TÜV/BV) and the "Applicant".
3.
Completion of the "Application Forms" indicating the type / scope of certification and stamps applied for and the "AIA" (Authorized Inspection Agency) selected and contracted
4.
The completed "Application forms" are returned to the ASME Accreditation Department / National Board by air courier (copy to AIA) / e-mail.


5.
Procurement of ASME Code Books, as required per type of certification applied for, with ASME / NB directly
6.
ASME notifies the AIA contracted to confirm to ASME that an Inspection Service Agreement has been signed with the "Applicant"
7.
The AIA and the "Applicant" establish a Time Schedule for all action to be taken to prepare the Joint Review
8.
Scheduling of the Joint Review date with ASME
9.
Preparation of the Joint Review:
  • preparation of the Quality Manual
  • preparation of a representative component or component part as demonstration item
  • preparation of the Welding Procedure Specification (WPS), Procedure Qualification Record (PQR), Welding personnel (WPQ / WOPQ)
  • preparation of the drawing and the design calculation
  • preparation of work procedures (e.g. for the hydrostatic test, heat treatment, handling of welding filler material, calibration, NDE)
  • demonstration (qualification) of NDE procedures to the AI (Authorized Inspector)
  • qualification of NDE personnel
  • material purchasing
  • preparation of Traveler (Fabrication/Testing/Inspection Sequence Plan)
  • preparation of the Manufacturers Data Report (MDR)
10.
Implementation of the above-mentioned quality program by the "Applicant"
11.
Pre-Joint Review to verify the implementation of the quality program performed by the AI and the AIS approx. 4 weeks before the Joint Review
12.
Joint Review with the AIA and ASME
13.
ASME issues the certificate(s) and the Code symbol stamp(s) to the "Applicant"
14.
The "Applicant" applies to the National Board for the "Certificate of Authorisation for Registration" and the NB-Stamp. This certificate is required to register components built and stamped in compliance with the ASME Code.The registration fee is depending on the size of each item.
15.
Receipt of the "Certificate of Authorisation for Registration" and the NB stamp.
16.
Fees:

US $ 10,000.00 Advance payment for Joint Review (This is balanced with actual costs after the Joint Review)  ASME
US $ approx 4,400.00 for Code books and binders ASME
US $ 2,610.00 per ASME certificate (For "H" or "UM":870 US $) ASME
US $ 260.00 per ASME stamp ASME
US $ approx  20.00 bank handling fee ASME
US $ Free of charge for Certificate of Authorisation for Registration and NB-stamp National Board
US $ approx 500.00 for NB Review (when the Review is conducted in conjunction with an ASME Joint Review) National Board
US $ 600.00 NB Certificate fee ("R"-stamp or "VR"-stamp or "NR"-stamp) National Board
US $ 60.00 per NB stamp ("R"-stamp or "VR"-stamp or "NR"-stamp) National Board
US $ Hard Copy 150.00 for National Board Inspection Code (NBIC) ANSI/NB-23 (electronic version on CD or Flash drive: 395 US $) National Board
  * Code books and certificates are valid for three years only.

REsource : www.onetb.com

Kamis, 30 Juni 2011

Cara Membuka Situs Atau Website Yang Diblokir Administrator

Waktu di kampus dulu saya sering kesal karena saat buka internet dengan fasilitas wifi dari kampus banyak situs atau website yang di blokir dulu yang selalu membuat saya kesal adalah situs facebook yang di blokir oleh administrator, ya pada intinya sih sebenarnya maksudnya kampus baik untuk membuat fasilitas wifi ini sebagai kepentingan kampus.
akhirya saya putar otak bagaimana caranya agar kita bisa membuka situs2 yang di blokir administrator tersebut, dan akhirnya ketemu juga cara untuk membuka situs atau website yang di blokir admin tersebut
berikut saya sedikit share tentang bagaimana membuka situs atau website yang di blokir administrator di jaringan wifi:
sebenernya caranya cukup simple yaitu dengan mengubah proxy kita jadi kita lolos dari daftar jaringan yang masuk ke admin
caranya adalah:
1. Buka free proxy dari xroxy
2. klik full proxylist yang ada di pojok kanan atas
3. kemudian ganti country pilih indonesia
Bisa juga pilih negara yang lain
4. Pilih proxy di list proxy di bawahnya
kalau pakai country indonesia biasanya yang port 80 atau 8080 yang bisa digunakan tapi kadang yang lain juga bisa, pilih saja mana yang bisa di gunakan
5. copy proxy salah satu proxy tersebut beserta portnya lalu ganti proxy kita dengan proxy yang kita copy tadi
jika ada yang belum tau bagaimana cara ganti proxy di mozilla saya sampaikan sekalian caranya mudah kok
klik tools => Options => Advanced => Network => Settings
lalu ganti options proxy dengan Manual Proxy Configuration, kemudian masukan proxy yang telah kita siapkan tadi
jangan lupa contreng use proxy this servernya lalu OK selesai deh……
jika kita belum bisa buka internet coba ganti proxy dengan proxy yang lain di XROXY tadi.
Semoga Bermanfaat

Incoming search terms:

  • cara membuka situs yg diblokir
  • cara membuka situs yang diblok
  • membuka situs yang diblok
  • cara buka situs yg di blokir
  • cara mengatasi situs yang di blokir
  • membuka situs blokir
  • cara membuka situs yg di blokir
  • cara masuk situs yang diblok
  • ganti proxy untuk membuka situs yang diblokir
  • cara membobol situs yang diblok

CARA MENGATASI SITUS YG DIBLOK OLEH ADMIN

Coba tengok situs berikut :
http://maswafa.blogspot.com/2010/01/cara-mengatasi-situs-yang-diblokir.html

Rabu, 29 Juni 2011

Comprehensive List of Excel Keyboard Shortcuts


Few weeks back I have invited all of you to share your excel keyboard shortcuts in a open thread. More than 50 people commented on that post and shared a hundred excel keyboard shortcuts with us. There were so many wonderful keyboard shortcuts and tricks buried in the comments section of that post. During the weekend, I spent sometime to collect all these beautiful shortcuts and arranged them neatly so that you can easily learn them.
Special thanks to all the commenters on the original post. Without you I couldn’t have learned these shortcuts.
Comprehensive List of Excel Keyboard Shortcuts

Here is the complete list of excel keyboard shortcuts.

Note: I have *ed some of the most important shortcuts. These are very useful and extremely time saving ones. You may want to remember a few to boost your productivity.
Select the whole column
Selection
CTRL + SPACE
Select the whole row
Selection
SHIFT + SPACE
Select table
Selection
SHIFT + CTRL + SPACE bar
Save
Selection
CTRL + s
Select visible cells only
Selection
ALT + ;
Select entire region
Selection
CTRL + A
Select range from start cell to far left
Selection
SHIFT + Home
Select range from start cell to end in direction of arrow
Selection
SHIFT + End + arrow
Select a continuous range of data (e.g. pivot), no matter where your cursor is.
Selection
CTRL + *
Select blank cells
Selection
F5 + ALT + S + K + ENTER
Select all cells with comments
Selection
CTRL + SHIFT + O
Select all cells that are directly or indirectly referred to by formulas in the selection
Selection
CTRL + SHIFT + {
Select all cells with formulas that refer directly or indirectly to the active cell
Selection
CTRL + SHIFT + }
Selects all the way to a1 from cursor position
Selection
CTRL + SHIT + HOME
Select cells in the direction of arrow
Selection
CTRL + SHIFT + Arrow
Previous sheet
Navigation
CTRL + Page Up
Next sheet
Navigation
CTRL + Page Down
Launch GO TO Dialog (from here you can select special or jump to a cell or range)
Navigation
F5
Go to top left (will go to top left of freezed pane if set)
Navigation
CTRL + Home
Go to last non-blank cell
Navigation
CTRL + end
Go to previous sheet
Navigation
CTRL + PgUp
Go to next sheet
Navigation
CTRL + PgDn
Print
Navigation
CTRL + p
Toggle between workbooks in a given session of excel.
Navigation
CTRL + TAB
Change the type of cell reference from relative to absolute or semi-absolute
Formulas
F4
Repeat whatever you did last
Formulas
F4
Debug portions of a formula (select and press)
Formulas
F9
Sum range
Formulas
ALT + =
Enter array formula
Formulas
CTRL + SHIFT + Enter
Select array formula range
Formulas
CTRL + /
Display range names (can be used when typing formulas)
Formulas
F3
Evaluate formulas. (its easy to remember when working with some “tuf” formulas!)
Formulas
ALT + TUF
Copy a formula from above cell and edit
Formulas
CTRL + '
Display the formula palette after you type a valid function name in a formula
Formulas
CTRL + A (while writing a formula)
Alternate between displaying cell values and displaying cell formulas
Formulas
CTRL + ` (Single Left Quotation Mark)
Calculate formulas
Formulas
F9
Select all precedent cells
Formulas
CTRL + [
Select all dependent cells
Formulas
CTRL + ]
Format Selection (cells, objects, charts)
Formatting
CTRL + 1
Bold a cell’s content
Formatting
CTRL + B
Format Painter – Paste formats from selection
Formatting
ALT + EST
Format as number with 2 dp
Formatting
CTRL + SHIFT + 1
Format as local currency
Formatting
CTRL + SHIFT + 4
Format as percentage with 0 dp
Formatting
CTRL + SHIFT + 5
Hide row
Formatting
CTRL + 9
Hide column
Formatting
CTRL + 0
Unhide row
Formatting
CTRL + SHIFT + 9
Unhide column
Formatting
CTRL + SHIFT + 0
Display the style command format menu
Formatting
ALT + '
Sets/removes strikeout in current cell
Formatting
CTRL + 5
Show/hide the top bar when you have a group
Formatting
Crtl + 8
Single border around selected cells
Formatting
CTRL + SHIFT + 7
Sort
Formatting
ALT + DS
Insert hyperlink
Formatting
CTRL + K
Freeze panes
Formatting
ALT + WFF
Remove grid lines or (alt+t)ov(alt+g)[enter]
Formatting
ALT + WVG (2007+)
To wrap lines
Formatting
ALT + HW (2007+)
Save as
Excel Options
F12
Collapse the ribbon (press again to expand)
Excel Options
CTRL + F1
Opens print preview
Excel Options
CTRL + F2
Maximize the current window
Excel Options
ALT + SPACE X
Activate next window
Excel Options
ALT + TAB
Activate previous window
Excel Options
ALT + SHIFT + TAB
Close an excel workbook
Excel Options
crtl + F4
Split screens
Excel Options
ALT + W + S
Create a pivot table in new sheet (of course after selecting the range)
Everything Else
ALT + DPF
Create a pivot table in the same sheet.
Everything Else
ALT + DPN
Show visual basic editor
Everything Else
ALT + F11
Macro dialog
Everything Else
ALT + F8
Apply/remove filter
Everything Else
ALT + DFF
Keep filter on columns, but show all rows
Everything Else
ALT + DFS
Insert pivot table
Everything Else
ALT + NVT
Turn filter on or off
Everything Else
CTRL + SHIFT + L
Paste values only
Editing
ALT + ESV
Edit a cell, place cursor at the end
Editing
F2
Show in-cell drop down with previously entered values
Editing
ALT + Down arrow
Fills down value from cell above
Editing
CTRL + D
Add a comment or Edit comment
Editing
SHIFT + F2
Insert new sheet
Editing
SHIFT + F11
Insert row
Editing
CTRL + +
Delete row
Editing
CTRL + -
Copy
Editing
CTRL + C
Paste
Editing
CTRL + V
Cut
Editing
CTRL + X
Undo
Editing
CTRL + Z
Get a line break inside the cell
Editing
ALT + Enter (while editing the cell)
Clear all contents
Editing
ALT + EAA
Copy
Editing
CTRL + insert
Paste
Editing
SHIFT + Insert
Make chart/pivot chart
Editing
F11
Edit a cell in Apple Macs
Editing
CTRL + U
Copy the value from the cell above the active cell into the cell or the formula bar
Editing
CTRL + SHIFT + "
Copies whatever is in the cell to the left of it.
Editing
CTRL + R
Delete box (cell, row, column)
Editing
ALT + ED
Insert box (cell, row, column)
Editing
ALT + IE
Enter current date
Auto Complete
CTRL + ;
Enter current time
Auto Complete
CTRL + :

Resource Chandoo.org